윈도우 환경에서 딥러닝을 GPU를 사용을 위해 여러가지 셋팅을 해봤는데 그중에 제일 쉬운것중에 하나가 miniconda를 가지고 셋팅하는 것입니다.
miniconda는 conda의 경량화 버젼 정도 인거 같습니다.
개인적인 자료 정리이기 때문에 각자의 환경에 따라 안될수도 있습니다.
설치환경
- Windows11
- NVIDIA GeForce RTX 3060 Ti
- Python 3.10
- tensorflow-gpu 2.9.1
- Miniconda3-latest-Windows-x86_64.exe
- cuda_11.8.0_522.06_windows.exe (이것은 영향이 없는거 같다. 하도 이것 저것 설치해서..)
- cudnn_9.0.0_windows.exe (이것은 영향이 없는거 같다. 하도 이것 저것 설치해서..)
참고 사이트 : https://junn.net/archives/2466
중간중간 에러난것은 인터넷 찾아서 해결함
1. cuda, cudnn 설치
CUDA : https://developer.nvidia.com/cuda-toolkit
cuDNN : https://developer.nvidia.com/cudnn
cuDNN은 NVIDA 회원가입을 해야 다운받을수 있습니다.
NVIDA에서 제공하는 tensorflow 버전별 CUDA, cuDNN : https://www.tensorflow.org/install/source_windows?hl=ko
2. Miniconda 설치
Miniconda : https://docs.anaconda.com/free/miniconda/index.html
3. Miniconda3 프롬프트에서 가상환경셋팅
conda create -n tf2 pip python=3.10
conda activate tf2


4. 텐서플로우 설치
pip install tensorflow-gpu==2.9.1

4.1 numpy, padas 같은 라이브러리는 conda 명령어로 설치함
conda install numpy
conda install pandas
혹시나 다른 모델의 h5 파일을 로딩해서 사용하려고 할때 load_weights 에러 발생시 대처방법 :
4.2 cudnn64_8.dll 파일을 못찾아서 폴더 검색후 CUDA 설치 폴더에 넣어줌
검색결과 C:\Users\jskang\miniconda3\pkgs\cudnn-8.1.0.77-h3e0f4f4_0\Library\bin 에 있었음
C:\Users\jskang\miniconda3\pkgs\cudnn-8.1.0.77-h3e0f4f4_0\Library\bin 에 있는 모든 dll을 복사후 CUDA 설치 폴더에 넣어줌 C:\Program Files\NVIDIA GPU Computing Toolkit\CUDA\v11.8\bin\
검색 (udnn64_8.dll)

파일 복사 (모든 dll 파일)

파일 붙여넣기

5. 테스트
import tensorflow as tf
print(tf.config.list_physical_devices('GPU'))
# [PhysicalDevice(name='/physical_device:GPU:0', device_type='GPU')]


# import os
# os.environ['TF_ENABLE_ONEDNN_OPTS'] = '0'
#
import tensorflow as tf
if tf.test.gpu_device_name():
    print('Default GPU Device: {}'.format(tf.test.gpu_device_name()))


import tensorflow as tf
print("TensorFlow version:", tf.__version__)

import tensorflow as tf

print("CPU LIST:", tf.config.list_physical_devices("CPU"))
print("GPU LIST:", tf.config.list_physical_devices("GPU"))
print("Deprecated AVAILABLE:", tf.test.is_gpu_available())  # Deprecated
print("Deprecated AVAILABLE:", tf.test.is_gpu_available(cuda_only=False))  # Deprecated
print("BUILD WITH CUDA:", tf.test.is_built_with_cuda())  # Installed non gpu package
#출력결과

(D:\myhome\miniconda3-envs\tf2) E:\work\Tensorflow_딥러닝AI>D:/myhome/miniconda3-envs/tf2/python.exe e:/work/Tensorflow_딥러닝AI/src/test-tensorflow.py
[PhysicalDevice(name='/physical_device:GPU:0', device_type='GPU')]
2024-03-20 16:56:52.345048: I tensorflow/core/platform/cpu_feature_guard.cc:193] This TensorFlow binary is optimized with oneAPI Deep Neural Network Library (oneDNN) to use the following CPU instructions in performance-critical operations:  AVX AVX2
To enable them in other operations, rebuild TensorFlow with the appropriate compiler flags.
2024-03-20 16:56:52.433759: I tensorflow/core/common_runtime/gpu/gpu_device.cc:1532] Created device /device:GPU:0 with 5592 MB memory:  -> device: 0, name: NVIDIA GeForce RTX 3060 Ti, pci bus id: 0000:01:00.0, compute capability: 8.6
2024-03-20 16:56:52.434433: I tensorflow/core/common_runtime/gpu/gpu_device.cc:1532] Created device /device:GPU:0 with 5592 MB memory:  -> device: 0, name: NVIDIA GeForce RTX 3060 Ti, pci bus id: 0000:01:00.0, compute capability: 8.6
Default GPU Device: /device:GPU:0
TensorFlow version: 2.9.1
CPU LIST: [PhysicalDevice(name='/physical_device:CPU:0', device_type='CPU')]
GPU LIST: [PhysicalDevice(name='/physical_device:GPU:0', device_type='GPU')]
WARNING:tensorflow:From e:\work\Tensorflow_딥러닝AI\src\test-tensorflow.py:43: is_gpu_available (from tensorflow.python.framework.test_util) is deprecated and will be removed in a future version.
Instructions for updating:
Use `tf.config.list_physical_devices('GPU')` instead.
2024-03-20 16:56:52.435138: I tensorflow/core/common_runtime/gpu/gpu_device.cc:1532] Created device /device:GPU:0 with 5592 MB memory:  -> device: 0, name: NVIDIA GeForce RTX 3060 Ti, pci bus id: 0000:01:00.0, compute capability: 8.6
Deprecated AVAILABLE: True
2024-03-20 16:56:52.435344: I tensorflow/core/common_runtime/gpu/gpu_device.cc:1532] Created device /device:GPU:0 with 5592 MB memory:  -> device: 0, name: NVIDIA GeForce RTX 3060 Ti, pci bus id: 0000:01:00.0, compute capability: 8.6
Deprecated AVAILABLE: True
BUILD WITH CUDA: True
6. TensorFlow 샘플소스
# 학점으로 대학교 합격여부 판단

import pandas as pd

data = pd.read_csv('./src/2.01.gpascore.csv')
# print(data)

# === 데이터 전처리 ====

# print(data.isnull().sum())# 데이터 빈칸 확인
data = data.dropna()        #NaN/빈값 있는 행을 제거
# data = data.fillna(100)   #빈칸을 100으로 채움
# print(data['gpa'])        #gpa열의 모든 데이터 출력
# print(data['gpa'].min())  #gpa열의 최소값 출력
# print(data['gpa'].count())#gpa열의 개수 출력


y데이터 = data['admit'].values  #리스트로 담아줌 [0 1 1 1 0 1 1 ...]
# print(y데이터)

x데이터 = []    #[[380.0, 3.21, 3.0], [660.0, 3.67, 3.0], [800.0, 4.0, 1.0], [640.0, 3.19, 4.0], ...]
for i, rows in data.iterrows():
    x데이터.append([rows['gre'], rows['gpa'], rows['rank']])

# print(x데이터)


# === 딥러닝 학습하기 ====

import numpy as np
import tensorflow as tf

# 1. 모델 디자인
model = tf.keras.models.Sequential([
    # activation = 활성함수(sigmoid, tanh, relu, softmax ...)
    # 마지막 결과 레이어는 sigmoid로 한다.(-1 ~ 1)
    tf.keras.layers.Dense(64, activation='softmax'),  # 중간 레이어 :  64 = 노드(동그란것) 개수
    tf.keras.layers.Dense(128, activation='relu'), # 중간 레이어 : 128 = 노드(동그란것) 개수
    tf.keras.layers.Dense(1, activation='sigmoid'),   # 결과 레이어 :   1 = 결과물 노드(동그란것) 개수
])

# 2. 모델 컴파일 하기
# optimizer = 경사하강법의 learning rate, 기울기등, adam이 가장 일반적이고 잘 맞음
# loss = binary_crossentropy=결과가 0-1 사이의 분류, 확률 문제에서 사용 : binary_crossentropy
# metrics=['accuracy'] 모델 평가방법
model.compile(optimizer='adam', loss='binary_crossentropy', metrics=['accuracy'])

# 3. 모델 학습(fit) 시키기
# x에는 학습데이터, y는 실제정답, epochs=학습횟수
# model.fit(x학습데이터, y실제정답, epochs=10)
# 일반리스트(x데이터)를 numpy array로 변환해야 fit에 집어 넣을수 있다.
# loss: 손실값=(예측-손실) 차이 낮으면 좋다 - accuracy: 정확도(예측값이 실제 데이터와 얼마나 정확히 맞는지)높으면 좋다.
model.fit(np.array(x데이터), np.array(y데이터), epochs=1000)

# 4. 예측
예측값 = model.predict([[750.0, 3.70, 3.0], [400.0, 2.2, 1]])
print(예측값) #[[8.788836e-01] [7.633746e-05]]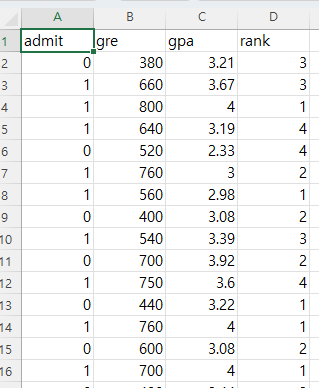
6.1 GPU 사용량 올라감

일단은 텐서플로우에서 GPU를 사용것에 만족함
===========================================================================
실패 했지만 윈도우 WSL2에서 텐서플로우에서 GPU 셋팅
2024.03.19 - [ML] - Windows11 Tensorflow2, NVIDIA CUDA 사용하기 (feat. wsl)
Windows11 Tensorflow2, NVIDIA CUDA 사용하기 (feat. wsl)
윈도우11 환경에서 Tensorflow2.x 와 GPU 를 사용하기 위해 NVIDIA CUDA를 사용하는 환경을 설정하는 방법을 알아보겠습니다. Tensorflow 문서를 보면 리눅스, 맥 OS, 윈도우 네이티브, 윈도우 WSL2 4가지 종류
dtbb.tistory.com
'ML' 카테고리의 다른 글
| HDF5 파일 로딩 에러 (ImportError: `load_weights` requires h5py package when loading weights from HDF5. Try installing h5py.) (1) | 2024.03.21 |
|---|---|
| Windows11 Tensorflow2, NVIDIA CUDA 사용하기 (feat. wsl) (2) | 2024.03.19 |
| 파이썬 2.6, 텐서플로우 1.x 스마트팩토리 프로그램 2024년에 사용하기 (0) | 2024.03.15 |
| 딥러닝에서 정밀도, 재현율이란? (0) | 2024.03.13 |

